Are you sick of the same old coffee creamers from the store that are full of dubious ingredients and preservatives? There’s nowhere else to look! We’re exploring the world of dairy-free substitutes today and creating a delicious coffee creamer made with almonds that will take your morning brew to new heights. Bid farewell to dairy without compromising flavour and creaminess.
Ingredients:
– 1 cup raw almonds (or raw cashews), soaked
– 1 pinch sea salt (optional)
– 2 cups water
– 2 medjool dates, pitted
– 1 tsp vanilla extract
Know Your Ingredients:
- Raw Almonds (or Raw Cashews):
Full of essential nutrients like magnesium and vitamin E, as well as protein and healthy fats.
- Sea Salt (optional):
During the soaking process, a small pinch of sea salt gives the nuts depth and richness.
- Water:
The consistency of the creamer is influenced by the amount of water used. The nuts-to-water ratio of 1:2 achieves a harmony between thickness and creaminess.
- Medjool Dates:
The natural sweetness of dates eliminates the need for refined sugars in the creamer.
- Vanilla Extract:
The creamer gains a pleasant, fragrant note from the addition of vanilla extract. To avoid artificial additives, choose pure vanilla extract.
Equipment
- High-Speed Blender:
Vital to make sure your almond creamer has a smooth, creamy texture. Nuts, water, and other ingredients are blended thoroughly in a high-speed blender.
- Nut Milk Bag (or Clean Towel/T-shirt):
Used to strain the blended mixture to separate the pulp from the liquid creamer. Though a fresh towel or t-shirt will work in a pinch, a nut milk bag is made especially for this use.
- Large Mixing Bowl:
To collect the liquid as you strain it from the pulp, place the nut milk bag over a large mixing bowl.
- Measuring Cups and Spoons:
Precise quantification is essential to preserving the proper ratio of components, guaranteeing the intended texture and taste.
- Storage Container:
An airtight container to keep your almond creamer fresh. To ensure freshness, choose a container that can be sealed tightly.
Instructions:
- Soak to Soften:
To begin, take your cup of raw cashews or almonds and soak them in luxury. This lessens the phytic acid in the nuts, softening them and making them creamier and simpler to digest. For extra richness, consider an overnight soak in cool water with a pinch of salt. An hour in extremely hot water with a dash of salt will work wonders if you’re in a rush.
- Blend to Perfection:
After the nuts have absorbed all the deliciousness, give them a quick rinse and drain. After transferring them, add two cups of filtered water to a high-speed blender. Aim for a 1 to 2 ratio of nuts to water for the ideal creamer consistency. Add the Medjool dates with pits and a teaspoon of vanilla extract.
- Blitz and Strain:
Allow the blender to do its magic for a minute or so, or until the texture is smooth and creamy. Now, cover a sizable mixing bowl with a clean towel or t-shirt if necessary, or grab a nut milk bag. Pour the blended mixture through the fabric or bag, making sure the edges are securely gathered. Squeeze it well so that all of the liquid is extracted and a pulpy residue is left behind.
- Get Creative with Pulp:
Keep that pulp that’s left over! It’s a multipurpose ingredient that can be used in a variety of recipes or made into an almond meal. Another environmentally friendly choice if you’re feeling generous is to compost.
- Store and Enjoy:
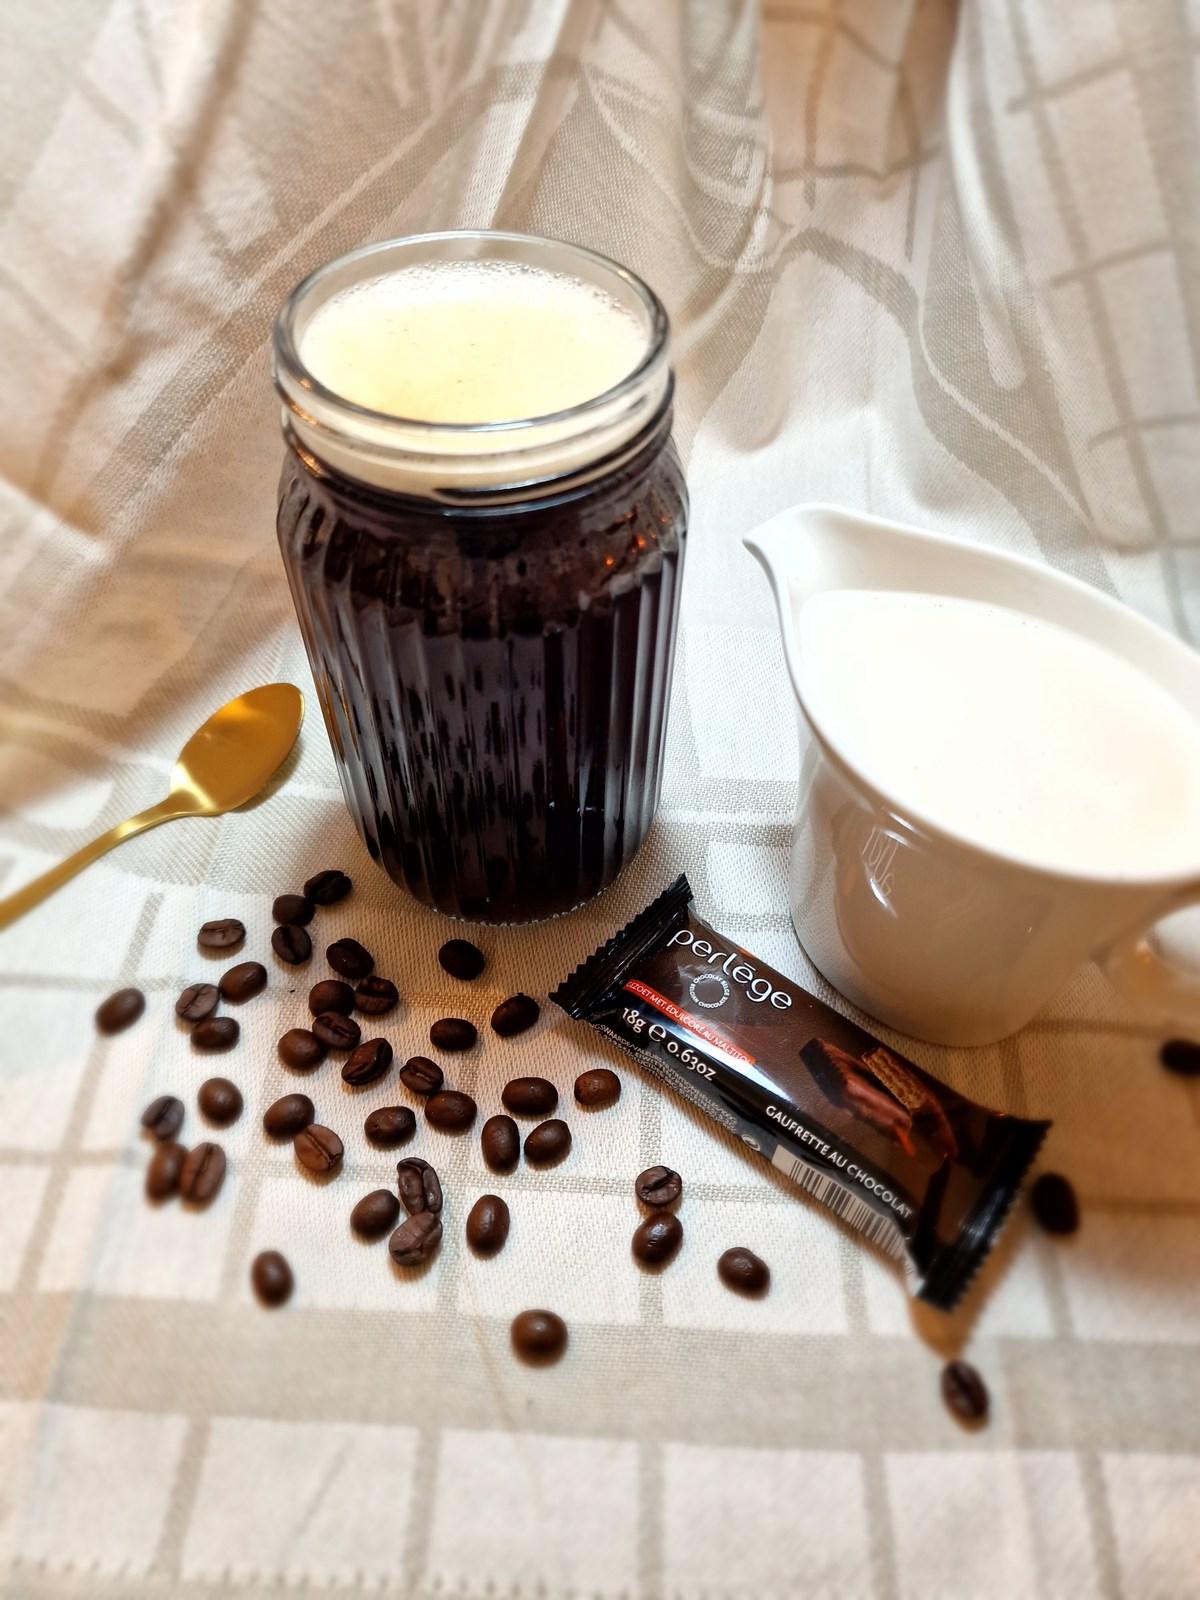
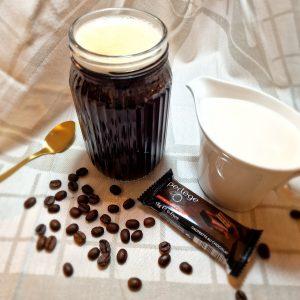
It’s time to add your homemade almond creamer to your morning routine. You can freeze it for up to a month or keep it covered in the fridge for up to four or five days. The deep, nutty taste is ideal for boosting your matcha, tea, or hot or cold coffee.
Storing Your Homemade Dairy-Free Almond Coffee Creamer:
- Refrigeration for Freshness:
Store Covered: Keep your almond creamer in a covered container to prevent it from absorbing odours from the fridge. A glass or BPA-free plastic container with an airtight seal is ideal.
- Shelf Life Awareness:
4-5 Days Refrigerated: When kept in the refrigerator, use your almond creamer within 4-5 days to ensure maximum freshness. Because it contains natural ingredients, it can spoil easily, so pay attention to the shelf life.
- Freezing for Extended Use:
Up to One Month: Freezing is a great way to prolong the life of your creamer if you’ve made a bigger batch. Store in freezer-safe containers and use within a month.
- Thawing and Reuse:
When you’re ready to use the frozen creamer, put it in the refrigerator to gradually thaw. Microwave use should be avoided as it can ruin the texture.
- Shake Well Before Use:
Even Distribution: If your creamer has been refrigerated or frozen, give it a good shake before use. This ensures that any separation that may have occurred is evenly redistributed, providing a consistent texture and flavour.
Well done! Now that you’ve started the process of making your dairy-free coffee creamer, the options are virtually limitless. This mixture made with almonds gives your favourite drinks a pleasant nutty undertone in addition to a creamy texture. Get creative and make your own nutritious and delectable coffee companion instead of relying on prepackaged options. To a new era of indulgence free of dairy!
DIY Dairy Free Coffee Creamer with Almonds
Ingredients
- 1 cup raw almonds or raw cashews, soaked
- 1 pinch sea salt optional
- 2 cups water
- 2 medjool date pitted
- 1 tsp vanilla extract
Instructions
- It’s important to soak the almonds (or cashews) to soften them, reduce phytic acid, and make a creamier, easier-to-digest nut milk. I prefer soaking overnight, covered in cool water with a pinch of salt (optional) — or covered in very hot water with a pinch of salt for 1 hour if you’re in a hurry.
- Once soaked, drain and rinse almonds and transfer to a high-speed blender along with 2 cups filtered water (for creamer, I like a ratio of 1 part nuts: 2 parts water), pitted Medjool dates, and vanilla extract.
- Blend on high for ~1 minute or until creamy and smooth. Then place a nut milk bag (or drape a clean towel or t-shirt) over a large mixing bowl and pour through the nut milk bag. Gather the edges securely and squeeze firmly until all of the liquid has been extracted and the pulp is left behind. You can either compost the pulp, make it into an almond meal, or find some more creative uses for it here.
- Store almond creamer covered in the refrigerator for up to 4-5 days, or in the freezer for up to 1 month. Perfect for use in hot or iced coffee, matcha, or tea.
Expert Tips for Perfect Dairy-Free Coffee Creamer:
- Optimal Soaking Time:
Increase the amount of time your almonds (or cashews) soak to get a more creamy texture. Soaking the nuts overnight facilitates their complete absorption of water, giving them a smoother texture.
- Precision with Water Ratio:
Precisely measure the water-to-nuts ratio to get the desired consistency. The ratio can greatly affect the texture of the creamer, so play around with it to find your ideal thickness.
- Flavorful Additions:
Increase the quality of your creamer by experimenting with different flavours. For a festive twist, try adding a little nutmeg or infusing a cinnamon stick while blending.
- Temperature Matters:
Consider carefully the temperature of the water you use to soak the nuts. The ultimate taste and consistency of your creamer can be affected by using hot water for a shorter soak time or cool water for a longer soak.
- Repurposing Pulp Creatively:
Don’t toss the leftover pulp away. Use your imagination to incorporate it into baked goods, smoothies, and energy bars. This gives your meals an added nutritional boost while reducing waste.
Thank You
Thank you so much for reading this blog! I hope you try this recipe and that you enjoy it as much as my family and I did! When you do make Diary Free Coffee Creamer, be sure to tag me on Instagram @pure_plates_recipe!
See you soon!